#tools
In March 2022, Google Analytics announced that they are sunsetting Universal Analytics properties in July 2023 and all Google Analytics users will need to use GA4.
Plus, all historical data in Universal Analytics will only be available for a limited time.
This means that if you want to have year over year comparison data in 2023 you will need to have GA4 tracking live by June 2022.
The good news is that GA4 is packed with features unavailable in UA:
Here’s an example of the revenue attribution difference on a GA4 property (using data-driven attribution) vs Universal Analytics property (last-click).
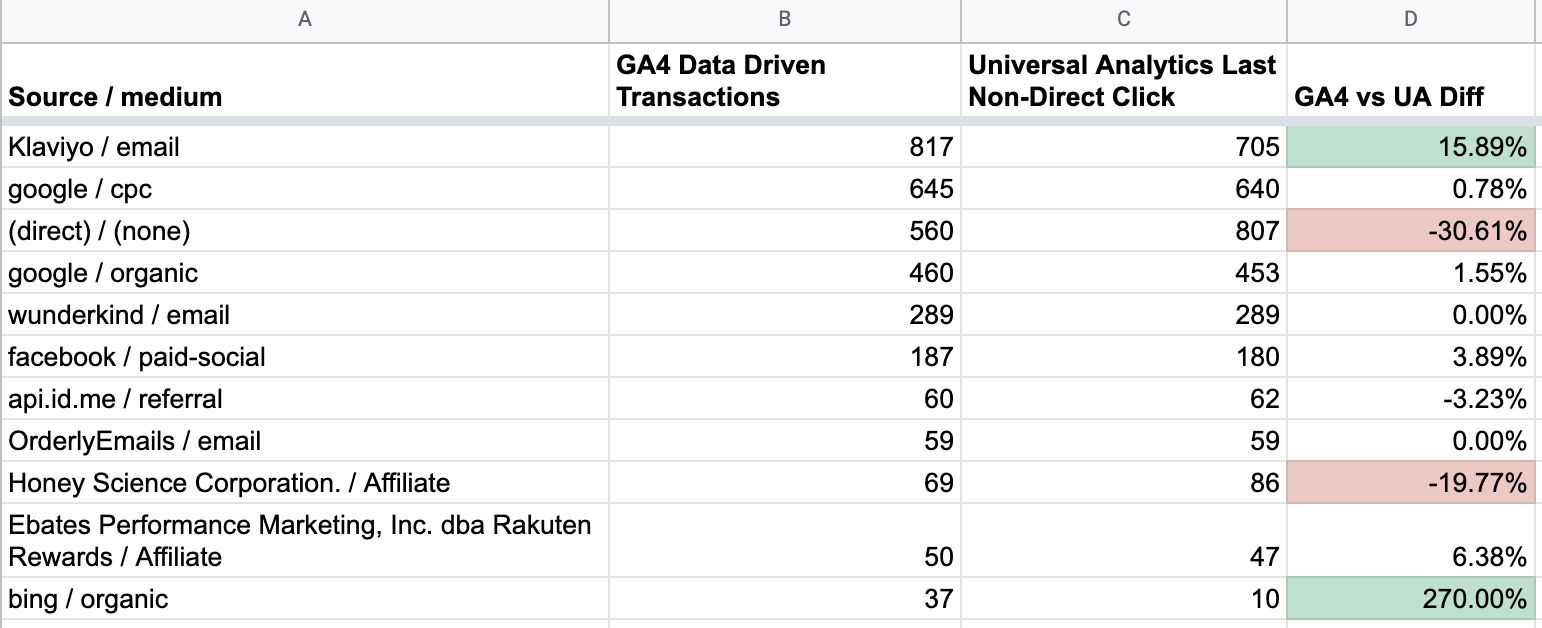
Quite the change in attribution!
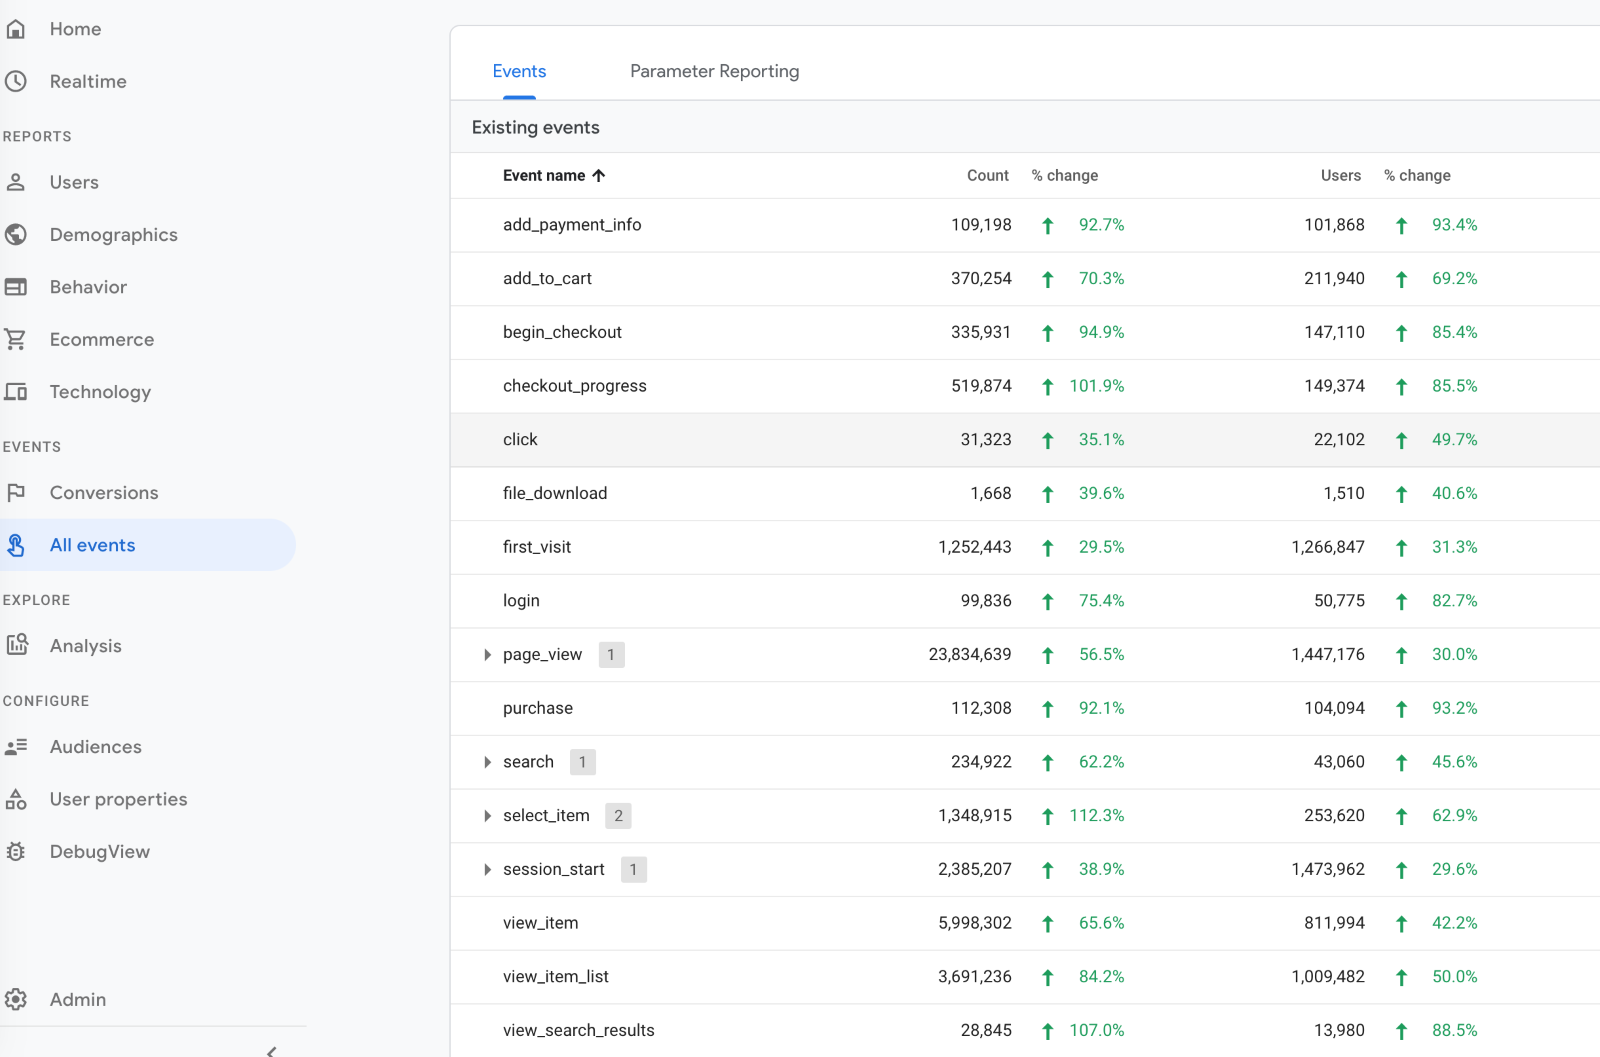
When it comes to tagging for GA4, the biggest change is the move to utilizing events (think event actions) and event parameters (think custom dimensions or unique event values).
For example, “pageview” is now an event called pageview:
These are similar to custom events in the Universal Analytics you are familiar with, however they are an even bigger focus in GA4.
Within each custom event you can define:
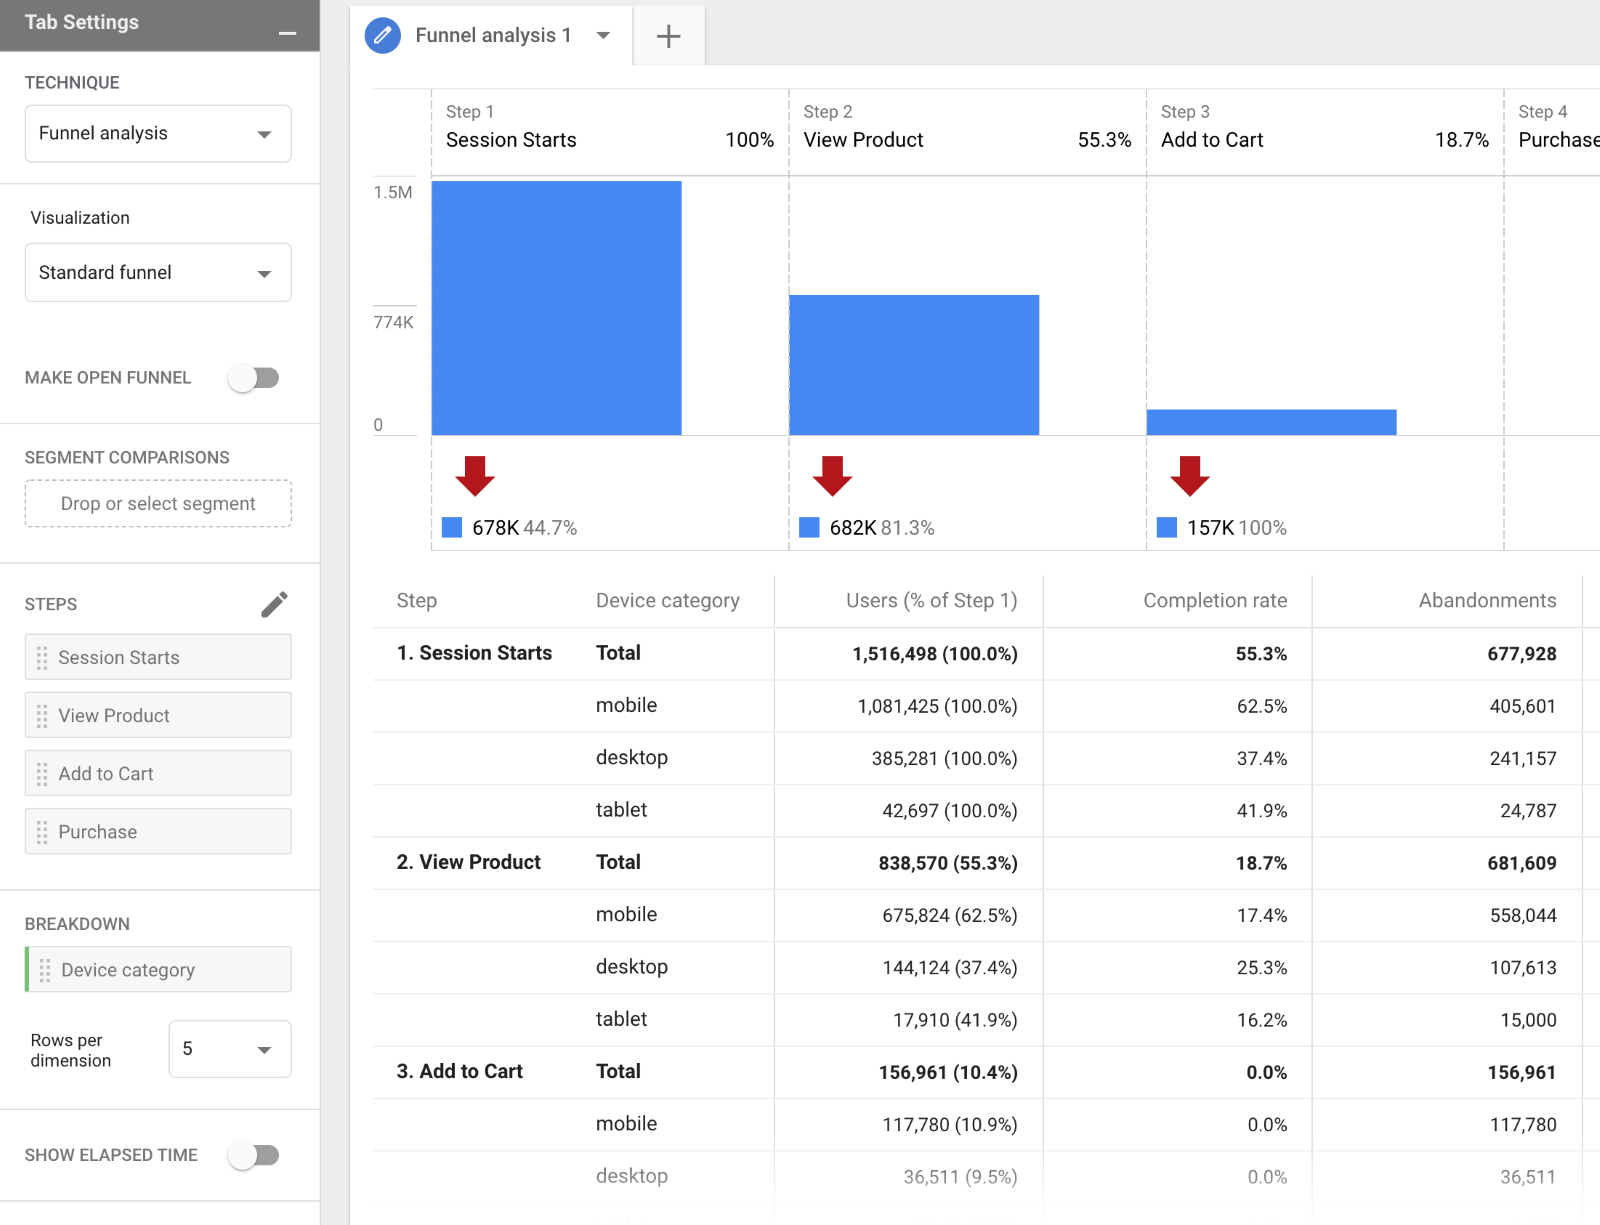
This can help you unlock more insights in the new reporting like the funnel builder.
The best way to describe the new funnel builder is that it’s like Goals in the old GA, however it’s retroactive and completely customizable.
The image below is an example of a custom funnel that you can create that mimics the shopping behaviour report.
Each of the steps can be anything you want.
Curious to understand the impact of your product videos?
You can create a funnel with session start => product view => video play => add to cart => purchase and break down by mobile vs desktop.
Many Shopify store owners struggle with properly connecting their Shopify accounts with Google Analytics, leading to a host of tracking woes.
In this blog, we'll show you the right way to connect Shopify and Google Analytics. We'll guide you through the mistakes to avoid when linking them and give you a step-by-step guide and we'll also explain how to check if the integration is working correctly.
The Pitfalls of Not Properly Connecting Shopify and Google Analytics:
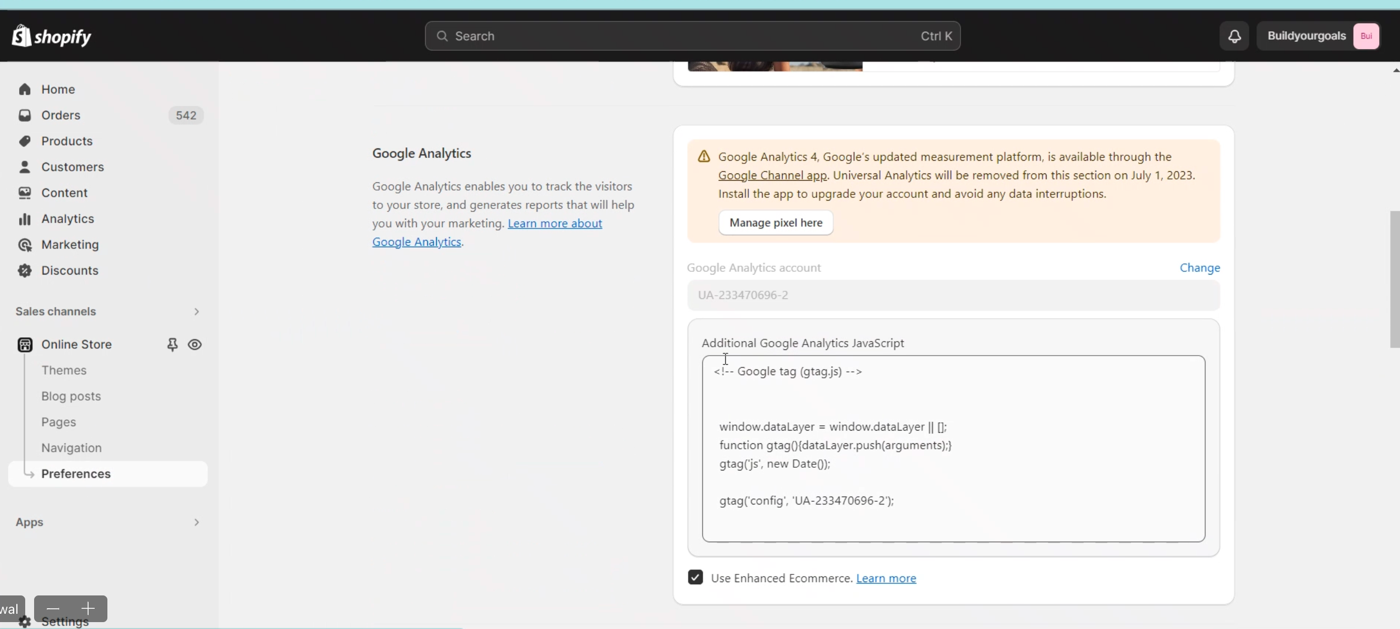
Before we dive into the intricacies of integrating Google Analytics with your Shopify store, it's essential to start with a clean slate.
This step is crucial to ensure that there are no conflicting codes or remnants from previous tracking attempts. ps. just like you connect your google analytics 4, you can also connect google ads. you don't have to add any code to your Online store tab under preference, if you have added it, please remove it.
Login into your Shopify admin panel to access your store’s setting.
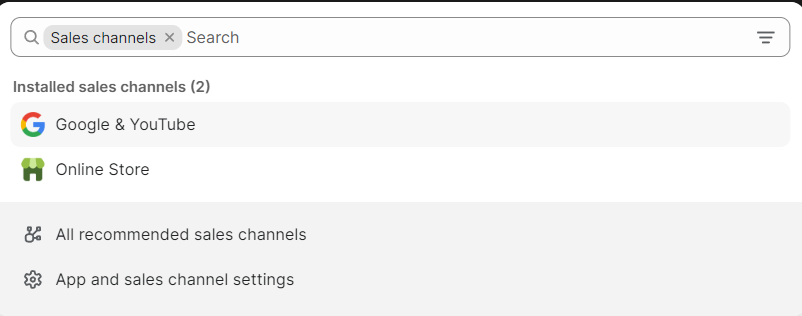
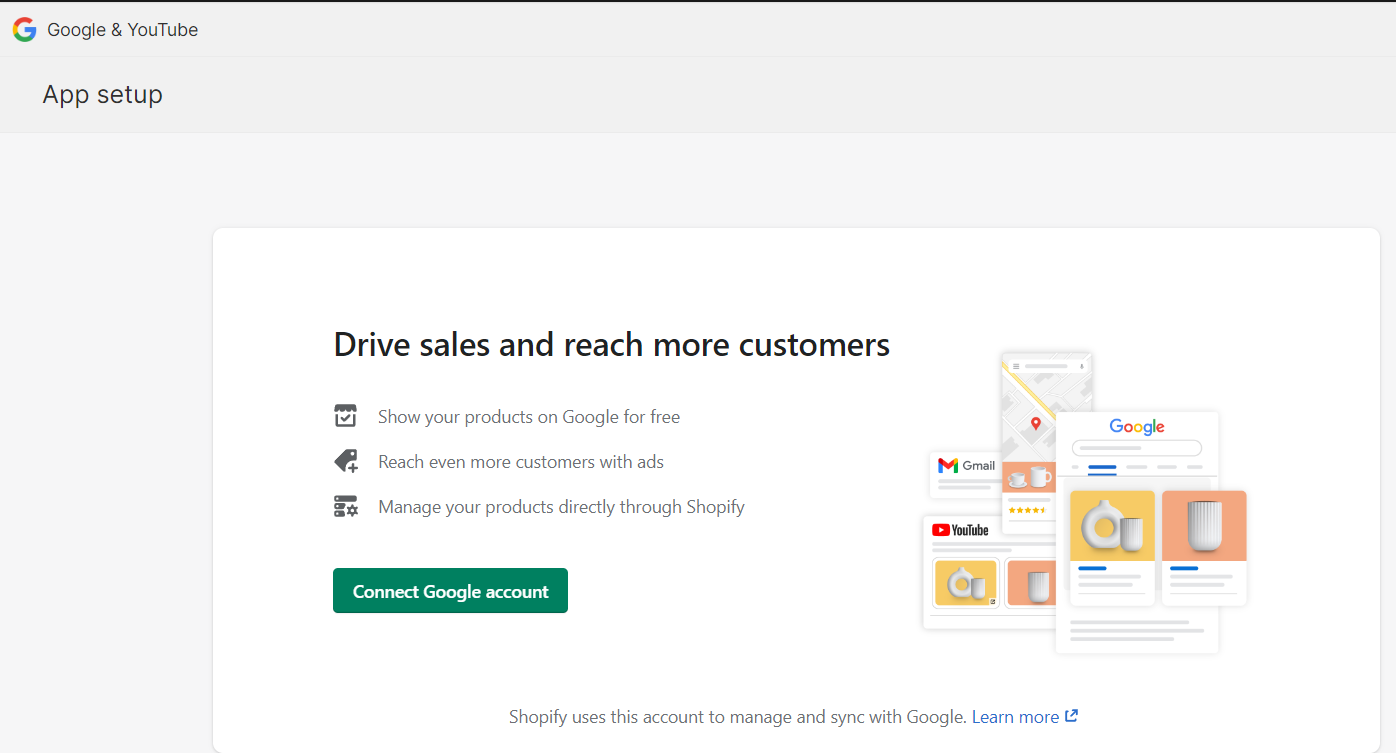
1. If You have already set up property, its will be displayed and just have to click “Connect”.
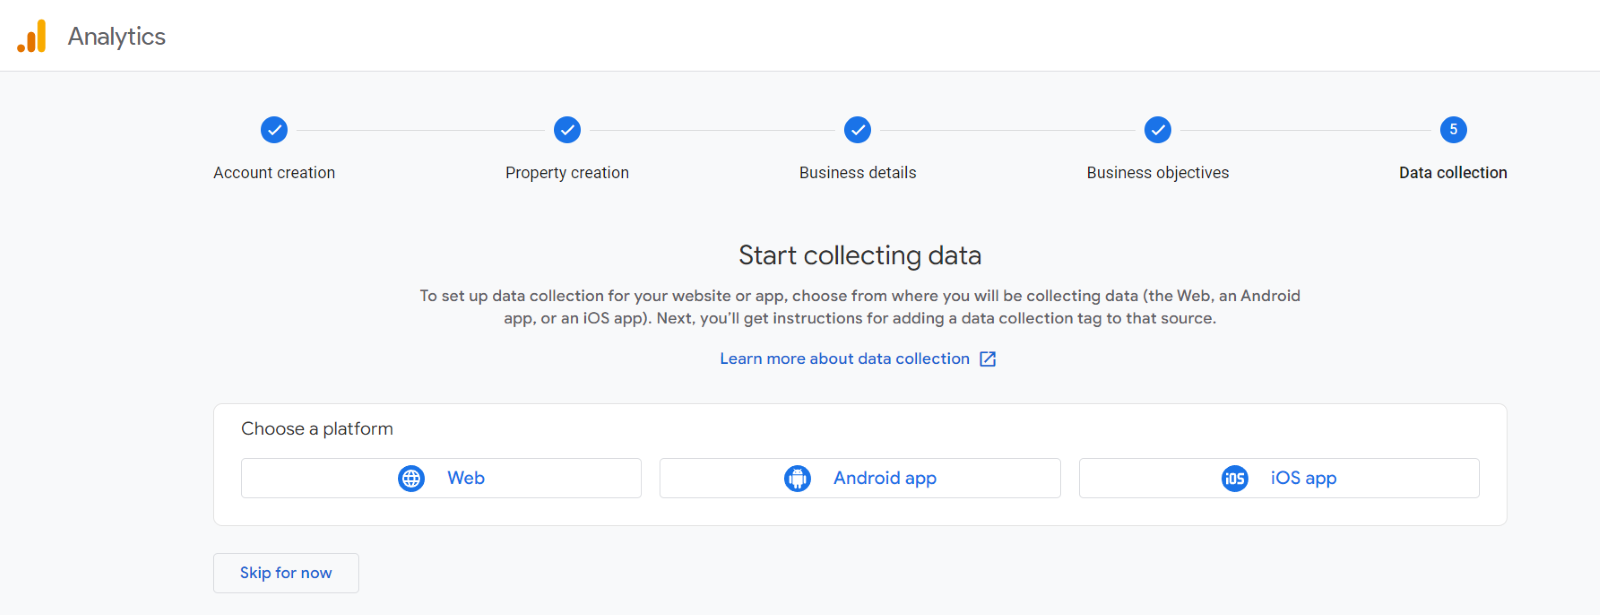
2. If you don't already have a Google Analytics account, start by signing up for one at https://analytics.google.com/Follow the prompts to create a new property for your website.

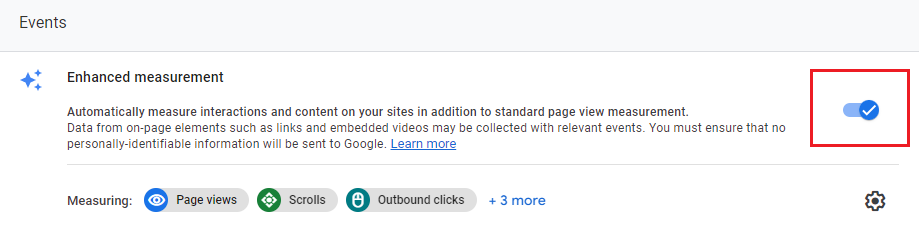
By utilizing Enhanced eCommerce, you can monitor and analyse how users engage with your product pages and checkout process.
Connecting your website to Google Analytics is important for figuring out how well your site is doing and understanding what users are doing. Just follow the steps in this guide to make sure you do it right.
Google Analytics provides information that can guide your decisions based on data, helping you enhance your online presence and reach your goals.
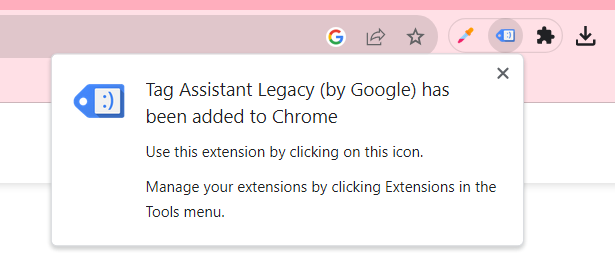
1. Open Google Chrome
2. Visit the Chrome Web Store (type "chrome://extensions/" in the address bar).
3. In the search bar, type "Google Tag Assistant" and press "Enter."
4. Locate the official "Google Tag Assistant" extension and click "Add to Chrome."
5. Confirm the installation by clicking "Add extension" in the pop-up box.
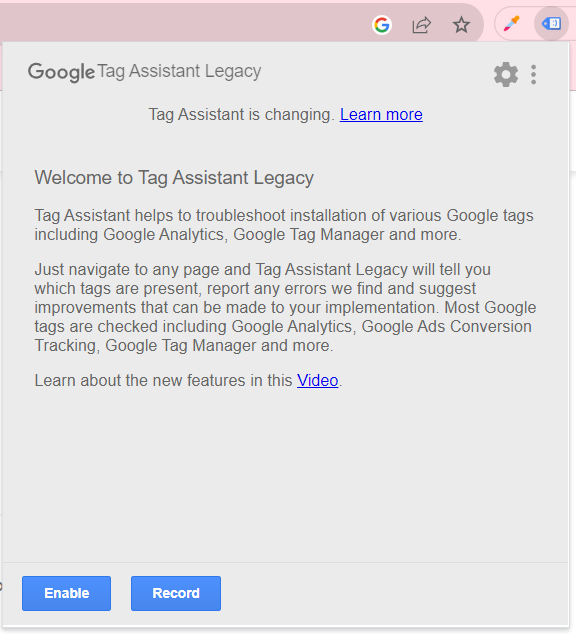
1. Once it's installed, you'll spot the Google Tag Assistant icon (a blue tag) at the top-right of your Chrome browser.
2. Just click on it to open the extension.
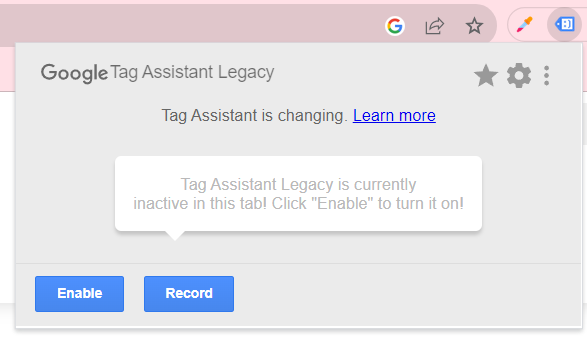
In the Google Tag Assistant window, click the "Enable" button to start recording.
1. Open a new tab or window in Chrome and visit the website you want to see if Google Analytics is tracking.
2. Move around different pages and do things on your site that make Google Analytics events happen, like viewing pages, clicking, or submitting forms.
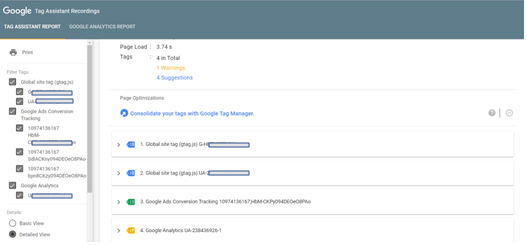
1. Go back to the Google Tag Assistant window, and you should see a list of tags that were detected on your website. Look for the Google Analytics tag in the list.
2. If the Google Analytics tag is green, it's working fine and collecting data.
3. If it's red, there might be a problem with how the tag is set up, so check it out.
4. Click on the Google Analytics tag to get more info about its setup.
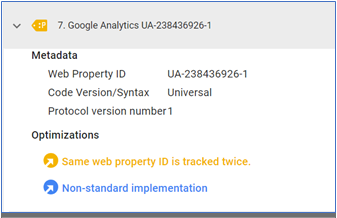
If the Google Analytics tag is red or has any errors, Google Tag Assistant will provide information about the issues it found. Review the error messages to identify the problem.
1. To resolve any issues with the Google Analytics tag, you'll need to go back to your website's code and make the necessary changes based on the error messages.
2. After you've corrected things, save the changes, and then update or reload your website.
1. Return to Google Tag Assistant, disable, and then enable recording again.
2. Repeat Steps 4 to 6 to ensure that the Google Analytics tag is now green and working correctly.
1. After confirming that the Google Analytics tag is working properly (green in Google Tag Assistant), you can further analyse the data in your Google Analytics account to ensure its measuring the desired metrics accurately.
By following these steps and using Google Tag Assistant, you can effectively verify whether your Google Analytics tag is functioning correctly and troubleshoot any issues that may arise in the tracking process. This helps ensure that you're collecting accurate data for analysis and decision-making.
1. Cross-Domain Tracking Challenges
Issue:
If your Shopify store spans multiple domains, you might encounter difficulties in tracking user sessions seamlessly across these domains.
Solution:
Implement cross-domain tracking to ensure a cohesive user journey. Update your Google Analytics settings and add the necessary code to your Shopify store to maintain accurate session tracking across domains.
Detailed Steps:
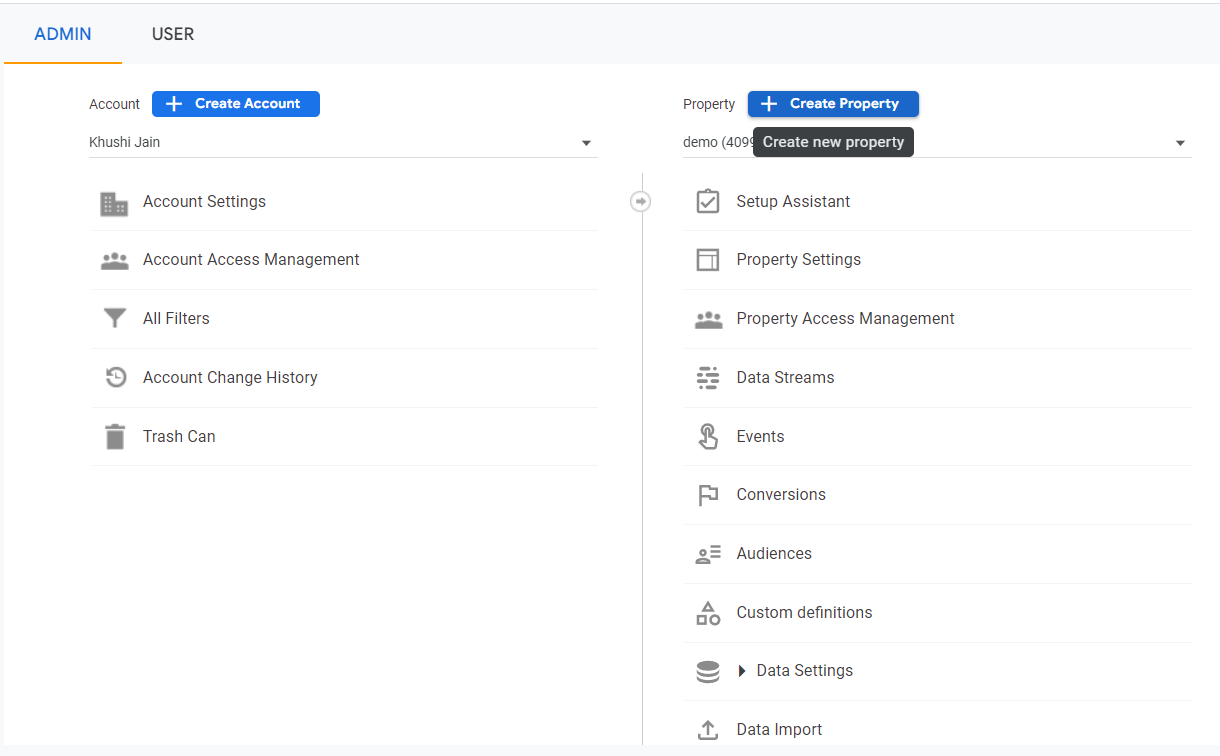
- In your Google Analytics account, navigate to Admin > Property > Tracking Info > Referral Exclusion List.
- Add all relevant domains to the exclusion list to prevent them from being treated as new sessions.
- Update your Shopify store code to include the cross-domain tracking script. Shopify allows for easy integration of this script in the theme settings.
2. Enhanced eCommerce Tracking Challenges
Issue:
Enhanced eCommerce tracking may not provide accurate insights due to issues such as incomplete data or misconfigured settings.
Solution:
Review and optimize your Enhanced eCommerce settings in both Shopify and Google Analytics to ensure comprehensive tracking of user interactions.
Detailed Steps:
- In your Shopify admin, go to Settings > Sales Channels > Online Store > Preferences. Confirm that there are no conflicting codes related to Google Analytics.
- In Google Analytics, navigate to Admin > Property > GA4 Setup > Data Streams. Verify that the Enhanced eCommerce settings are enabled for the relevant data stream.
3. Google Analytics 4 Configuration
Issue:
Users may face challenges in configuring Google Analytics 4 properly, leading to data discrepancies and incomplete tracking.
Solution:
Provide a step-by-step guide on configuring GA4, emphasizing the importance of filling in all required details accurately.
Detailed Steps:
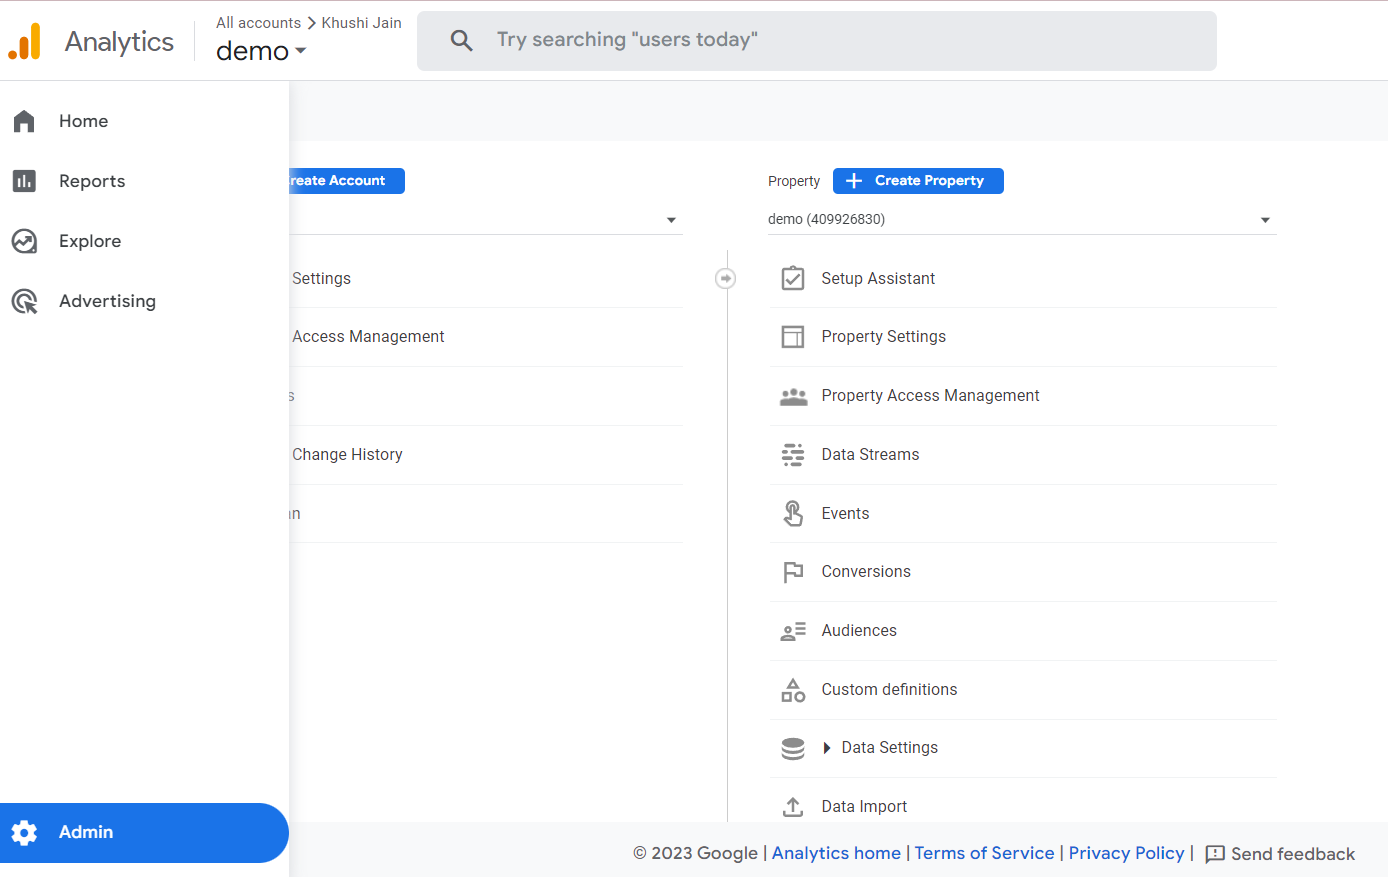
- In Google Analytics, navigate to Admin > Property > GA4 Setup > Create Property. Follow the prompts to enter accurate information about your website.
- Once the property is created, note down the Stream ID and Measurement ID.
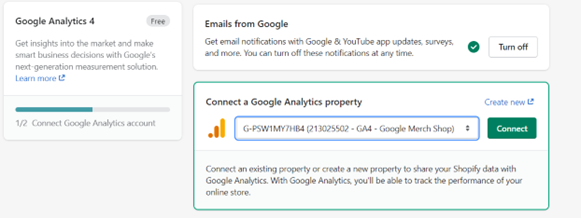
- In Shopify, go to the Google Analytics settings and connect your GA4 property using the provided IDs.
By addressing these troubleshooting scenarios, users will be better equipped to navigate and resolve issues that may arise during the integration process, ensuring a smoother and more accurate connection between their Shopify store and Google Analytics 4.
The integration of your Shopify store with Google Analytics marks the beginning of a data-driven voyage. Armed with insights from advanced features like custom reports, event tracking, and audience segmentation, you're empowered to optimize conversions, enhance user experiences, and refine marketing strategies. This isn't just a technical connection; it's a strategic leap toward e-commerce excellence. As you navigate this journey, may your decisions be guided by the wealth of data at your fingertips, leading your Shopify store to unprecedented success in the ever-evolving landscape of online commerce. Happy analyzing and here's to your continued growth!